Appearance & FAQs
This tab is entirely about how the assistant looks and speaks on your site. Nothing here changes what it knows.
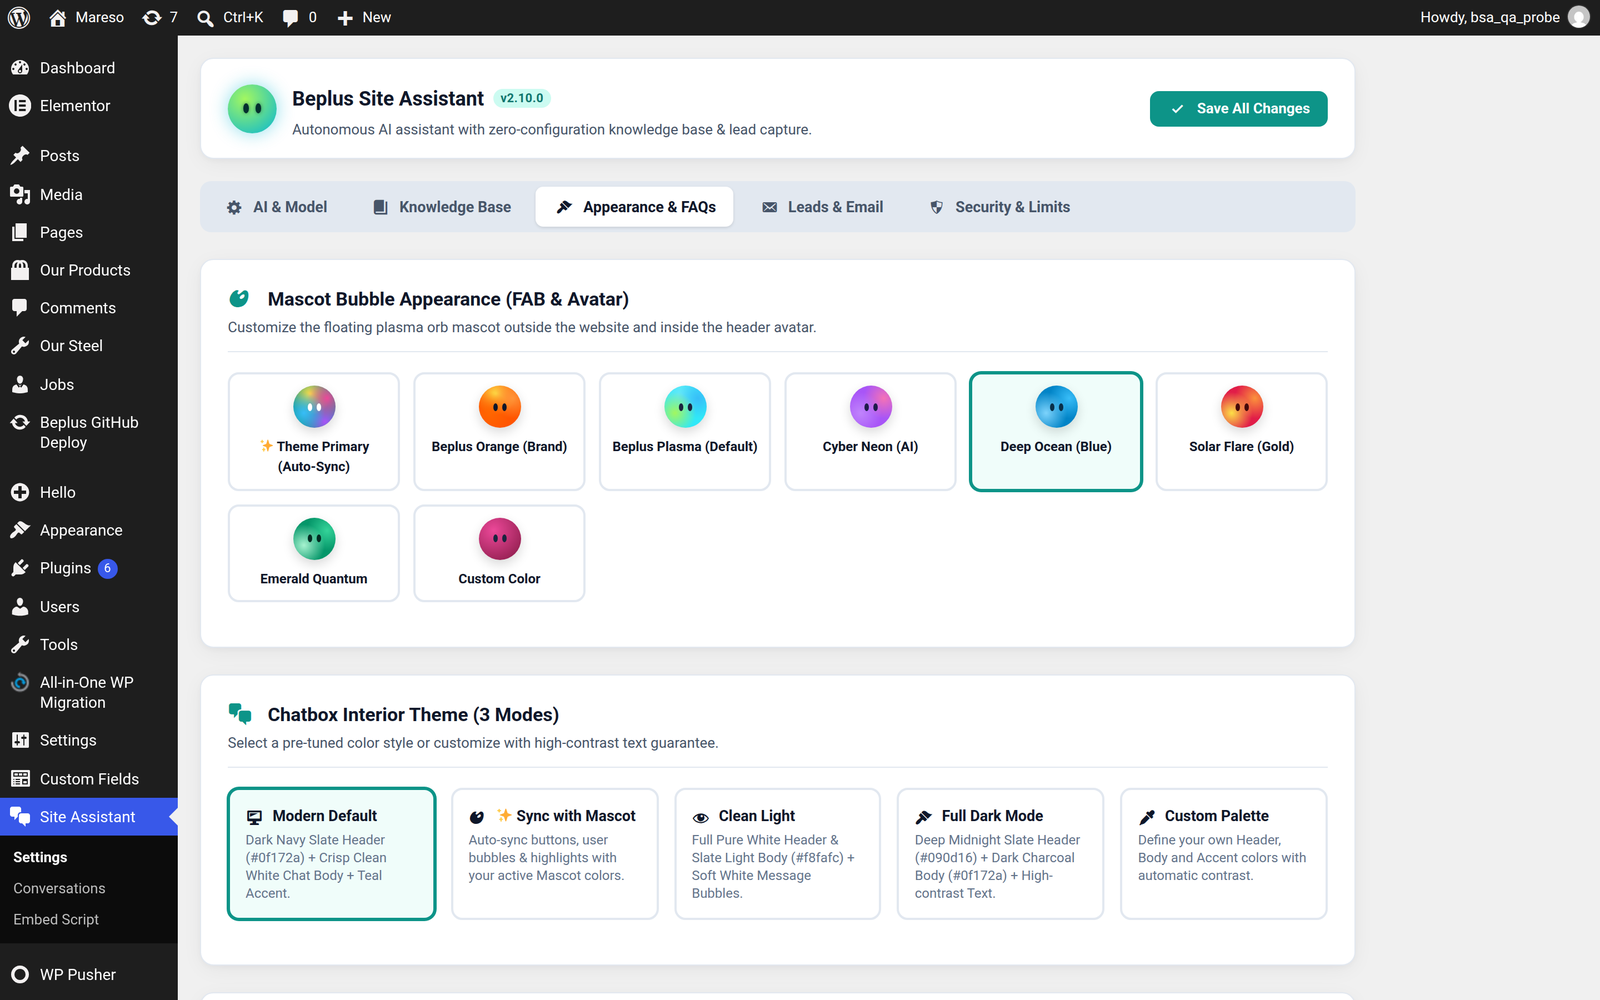
The floating mascot
The Mascot Theme is the glowing orb that floats in the corner of every page. Pick a preset:
| Theme | Look |
|---|---|
| ✨ Theme Primary (Auto-Sync) | Takes its colour from your active theme, so it never clashes |
| Beplus Orange (Brand) | Brand orange |
| Beplus Plasma (Default) | The green-and-blue plasma look |
| Cyber Neon (AI) | Bright neon |
| Deep Ocean (Blue) | Cool blue |
| Solar Flare (Gold) | Warm gold |
| Emerald Quantum | Deep emerald |
| Custom Color | Your own colour picker |
Auto-Sync is the safe choice if your theme colours change between seasons — the orb follows along on its own.
The Widget Screen Position setting puts it bottom right (the default most visitors expect) or bottom left, for sites where something else already occupies the right corner.
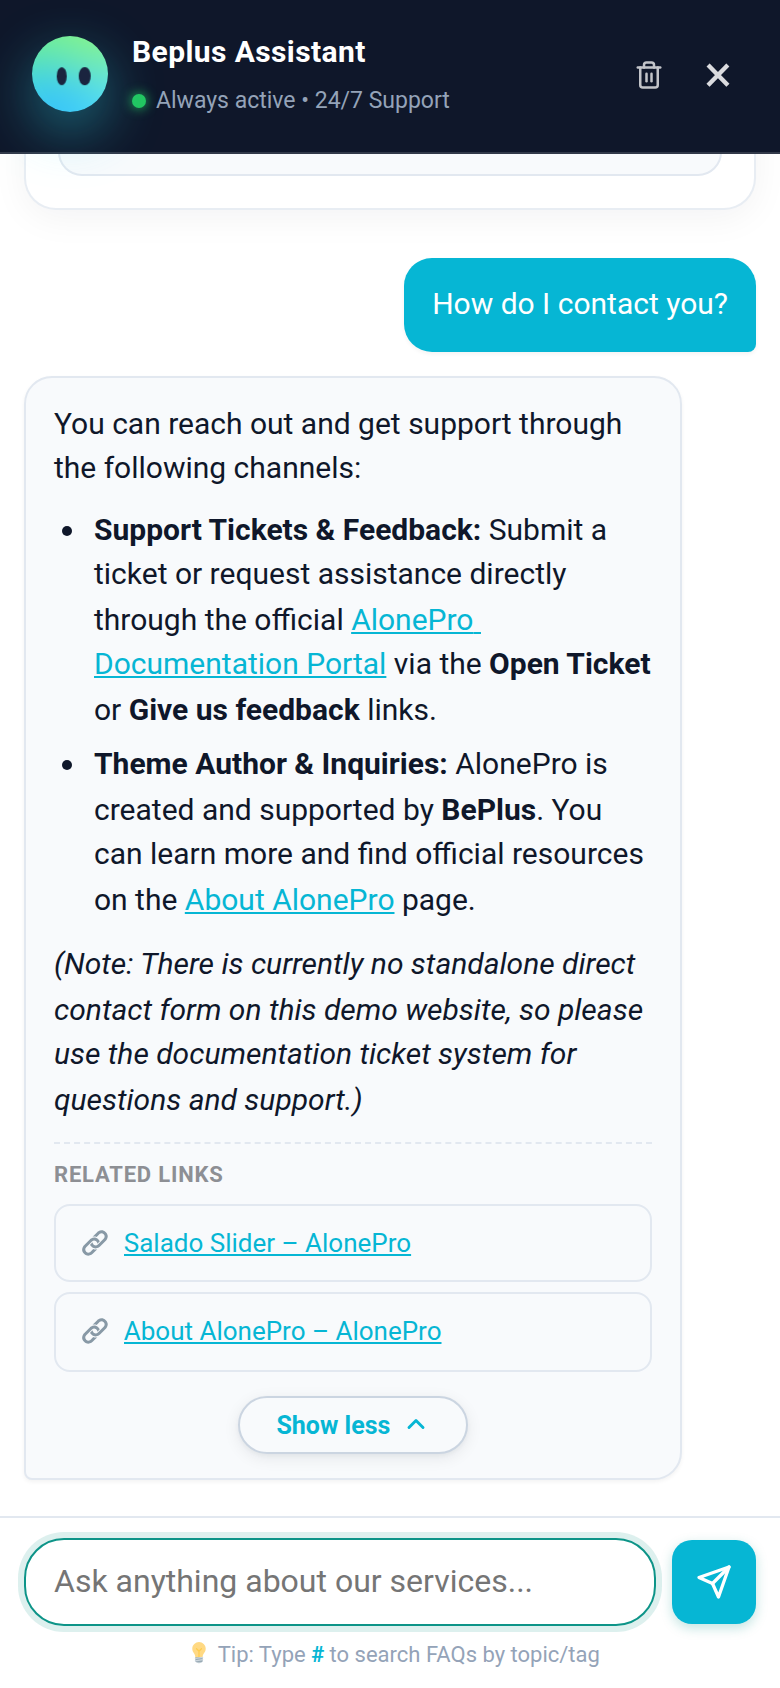
On a phone the assistant fills the width, so a visitor reads an answer without pinching or scrolling sideways. The suggested questions stack the same way, and the message box stays fixed at the bottom of the screen.
Chat colours
The chat window itself has three colours. You can either pick a ready-made palette preset or set them yourself:
| Preset | What it looks like |
|---|---|
| Modern Default | Dark navy header, white body, teal accent |
| ✨ Sync with Mascot | Buttons and highlights follow your mascot colour |
| Clean Light | All white and pale grey — quiet and neutral |
| Full Dark Mode | Dark header and body, for sites that are dark throughout |
| Custom Palette | Your own header, body and accent colours |
When you set colours yourself, three fields appear:
- Header Background — the bar at the top of the chat
- Chat Body Background — the area behind the messages
- Accent Color — buttons, the send icon and the visitor's own message bubbles
💡 Text contrast is handled for you. If you choose a dark accent colour, the text on it flips to light automatically, so a button label never becomes unreadable. You do not need to check contrast ratios yourself.
Every word the visitor sees
The assistant's wording is not fixed — all of it is editable, so the chat can speak in your brand's voice:
| Field | Where it appears |
|---|---|
| Assistant Name | The title in the chat header |
| Status Subtitle | The small line under the name — "Always active • 24/7 Support" by default |
| Floating Teaser Greeting | The small speech bubble next to the mascot, before anyone clicks |
| Teaser Appearance Timing | When that bubble appears — see below |
| Start Screen Title | The heading on the form that asks for name and email |
| Start Button Label | The button on that form |
| Chat Input Placeholder | The grey hint text inside the typing box |
Teaser Appearance Timing deserves a note. Leave it empty and the bubble
appears on its own when the visitor shows interest — after four seconds of
inactivity, or once they have scrolled 15% of the page. Neither means a visitor
who bounced in the first second gets interrupted. Enter a number of seconds
(such as 5) if you want it on a fixed timer instead.
FAQs
Below the wording is your FAQ list. These are the questions visitors ask most, answered instantly — no AI call, no waiting, no token cost.
Each row has:
- A question and its answer
- An icon you can change — a set of built-in choices, or a link to an image
- A "show in hero" flag, which also surfaces it on the start screen so the most common questions are answerable before anyone types anything
You can drag to reorder the list. Order matters: the ones at the top are the ones visitors see.
💡 FAQs also reduce your AI bill. A question answered from your FAQ list costs nothing. Every common question you move there is one fewer AI call, and one fewer chance for the model to paraphrase something you would rather phrase exactly.
Moving your FAQ list between sites
Two buttons at the bottom:
- 📤 Export FAQs (JSON) — downloads the whole list as a file
- 📥 Import FAQs (JSON) — loads a list back in
That is how you copy a tuned FAQ list from a staging site to a live one, or set up several sites from one master list.
Saving
Press Save Appearance Settings at the bottom. Changes appear on the site immediately on the next page load — there is no cache to clear.