Installation
What you need
| WordPress | 6.1 or newer |
| PHP | 7.4 or newer |
| AI provider | Either a provider plugin from Settings → Connectors, or any OpenAI-compatible endpoint |
Nothing else. There is no account to create and no external service to sign up to unless you want one.
Step 1 — Install the plugin
Download beplus-site-assistant.zip, then in WordPress go to
Plugins → Add New → Upload Plugin, choose the ZIP, and press Install Now.
💡 Replacing an older copy? WordPress offers Replace current version. Your settings and your conversations are kept — the ZIP only replaces the plugin files.
Press Activate.
Step 2 — Open the assistant settings
In the left-hand admin menu you will now see Site Assistant. Open it. This is where everything lives:
- Settings (where you land) — five tabs along the top
- Conversations — the log of what visitors asked, plus SEO Insights
- Embed Script — for putting the assistant on a non-WordPress site
Step 3 — Connect an AI provider
Open the AI & Model tab. There are two ways to connect, and you only need one.
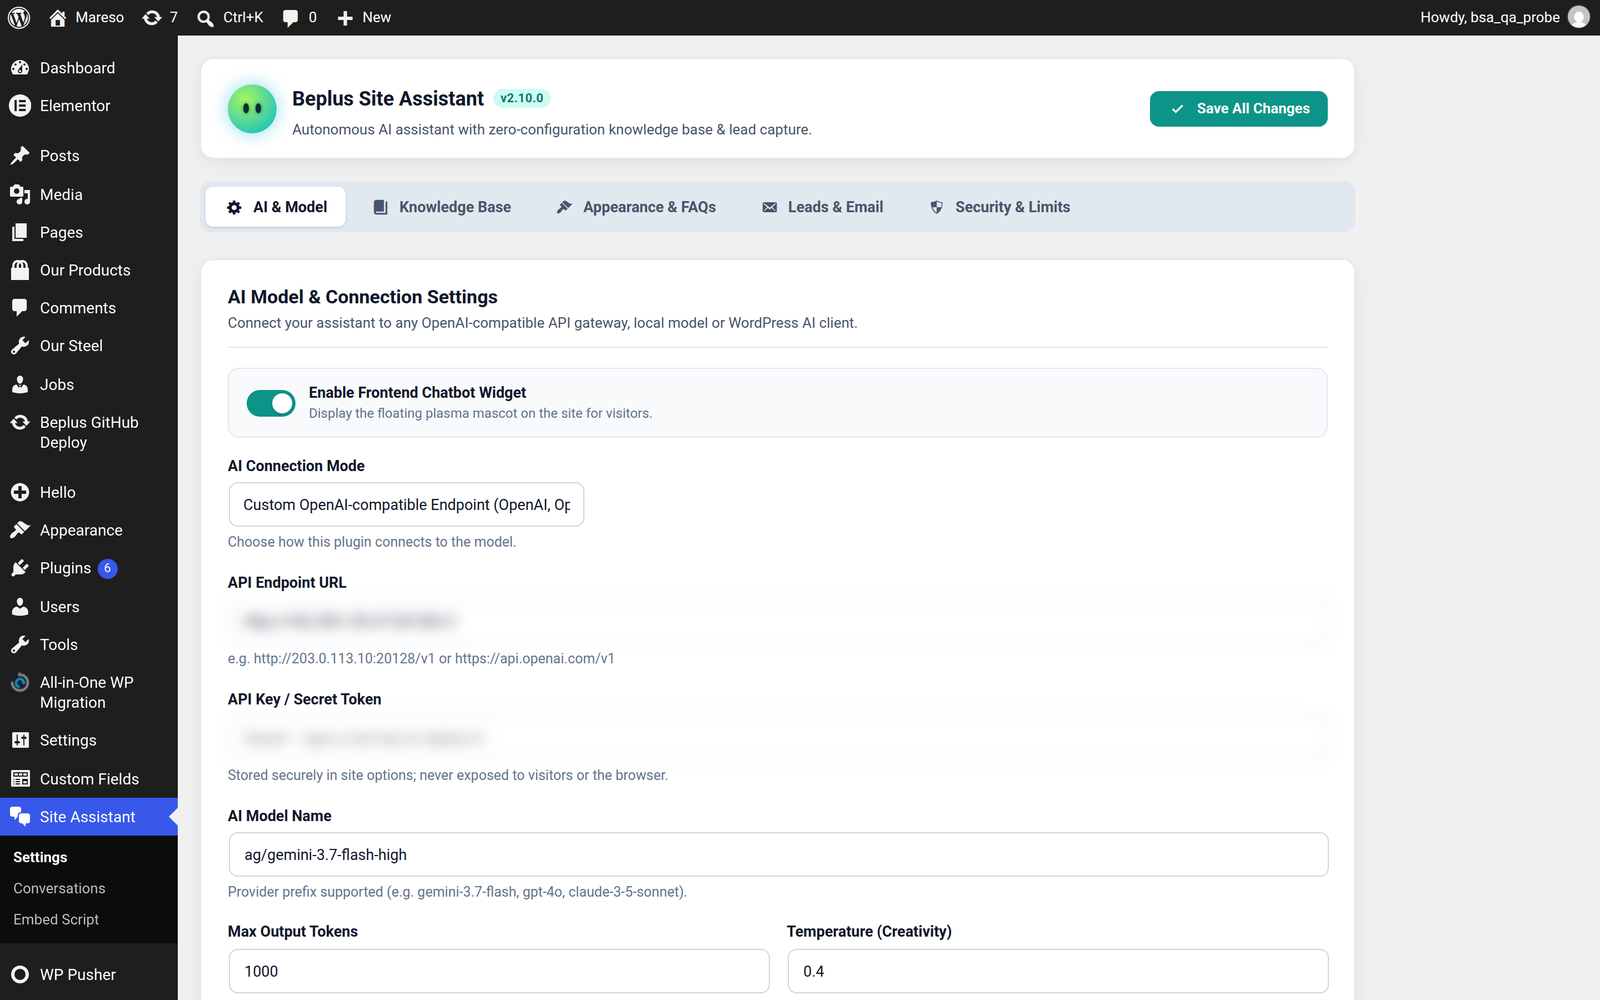
Option A — WordPress AI Client (recommended if you have a provider plugin)
Install a provider plugin from Settings → Connectors, add your key there, and choose WordPress AI Client (Native Connectors) here. The assistant picks up that key automatically, and you manage it in one place.
Option B — Custom endpoint
Choose Custom OpenAI-compatible Endpoint and fill in three fields:
| Field | What to put in it |
|---|---|
| API Endpoint URL | The base address, e.g. https://api.openai.com/v1. The plugin adds the rest of the path itself. |
| API Key / Secret Token | The key from your provider. Once saved it is never shown again. |
| Model | Which model to use, e.g. gpt-4o-mini. Leave it empty to use the provider's default. |
This mode works with any provider that speaks the OpenAI chat format — OpenAI, OpenRouter, Groq, DeepSeek, Anthropic through a gateway, a local Ollama, or your own server.
⚠️ Seeing 503 errors? Your chosen model is probably overloaded. Naming a smaller or newer model in the Model field usually fixes it.
Press Save AI Settings.
Step 4 — Scan your content
Open the Knowledge Base tab and press Re-scan site. The assistant reads your pages, posts and products and turns them into something it can search.
On a large site this takes a while — the progress is shown as it goes. You can leave the page; the scan continues and the results are kept.
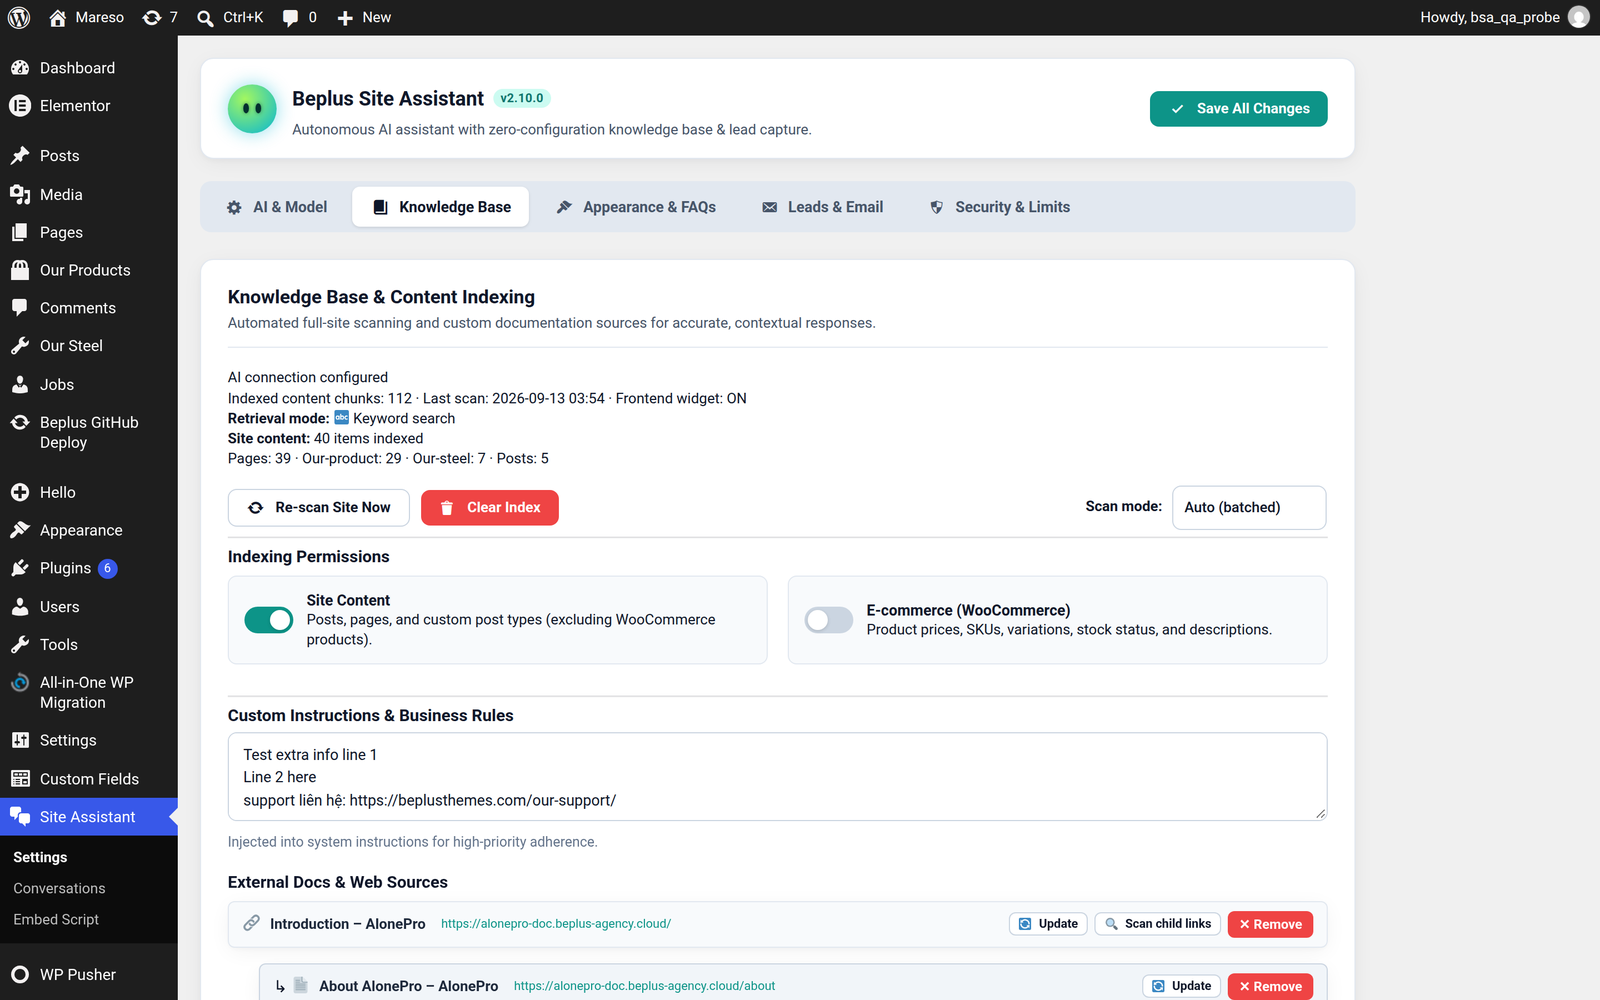
After the first scan the plugin re-scans daily by itself, so new pages are picked up without you doing anything.
Step 5 — Try it
Open your own website in a new tab. The assistant should be floating in the bottom corner. Ask it something that only your site could answer — a price, an opening time, a page name.
If nothing appears, go to Troubleshooting; there are only a few possible causes and each one has a fix.
Optional — see it on the test bench
Before letting visitors near it, this sequence catches most problems:
- Settings → Leads & Email → Send Test Email — proves your site can send mail at all.
- Conversations → SEO Insights → Analyse — proves the AI connection works end to end.
- Ask the widget a question, then refresh Conversations and check the conversation was recorded.